Postman Configuration
ThreatConnect® offers a v3 API collection that you can fork or import into Postman®. This page details how to fork and import the ThreatConnect v3 API collection, configure the collection’s variables, and make an API request using the collection.
Step 1: Fork or Import the ThreatConnect v3 API Collection
Navigate to the ThreatConnect v3 API Postman collection and perform one of the following actions:
Export the collection and then import it into Postman
Step 2: Configure the ThreatConnect v3 API Collection
Select Collections in the Postman sidebar. Then select the ThreatConnect API collection that was either forked or imported into your workspace to open a ThreatConnect API tab in the Postman workbench.
Select the Authorization subtab in the ThreatConnect API tab. Then select No Auth in the Auth Type dropdown, as the collection’s pre-request script will perform all steps in the authentication process (Figure 1).
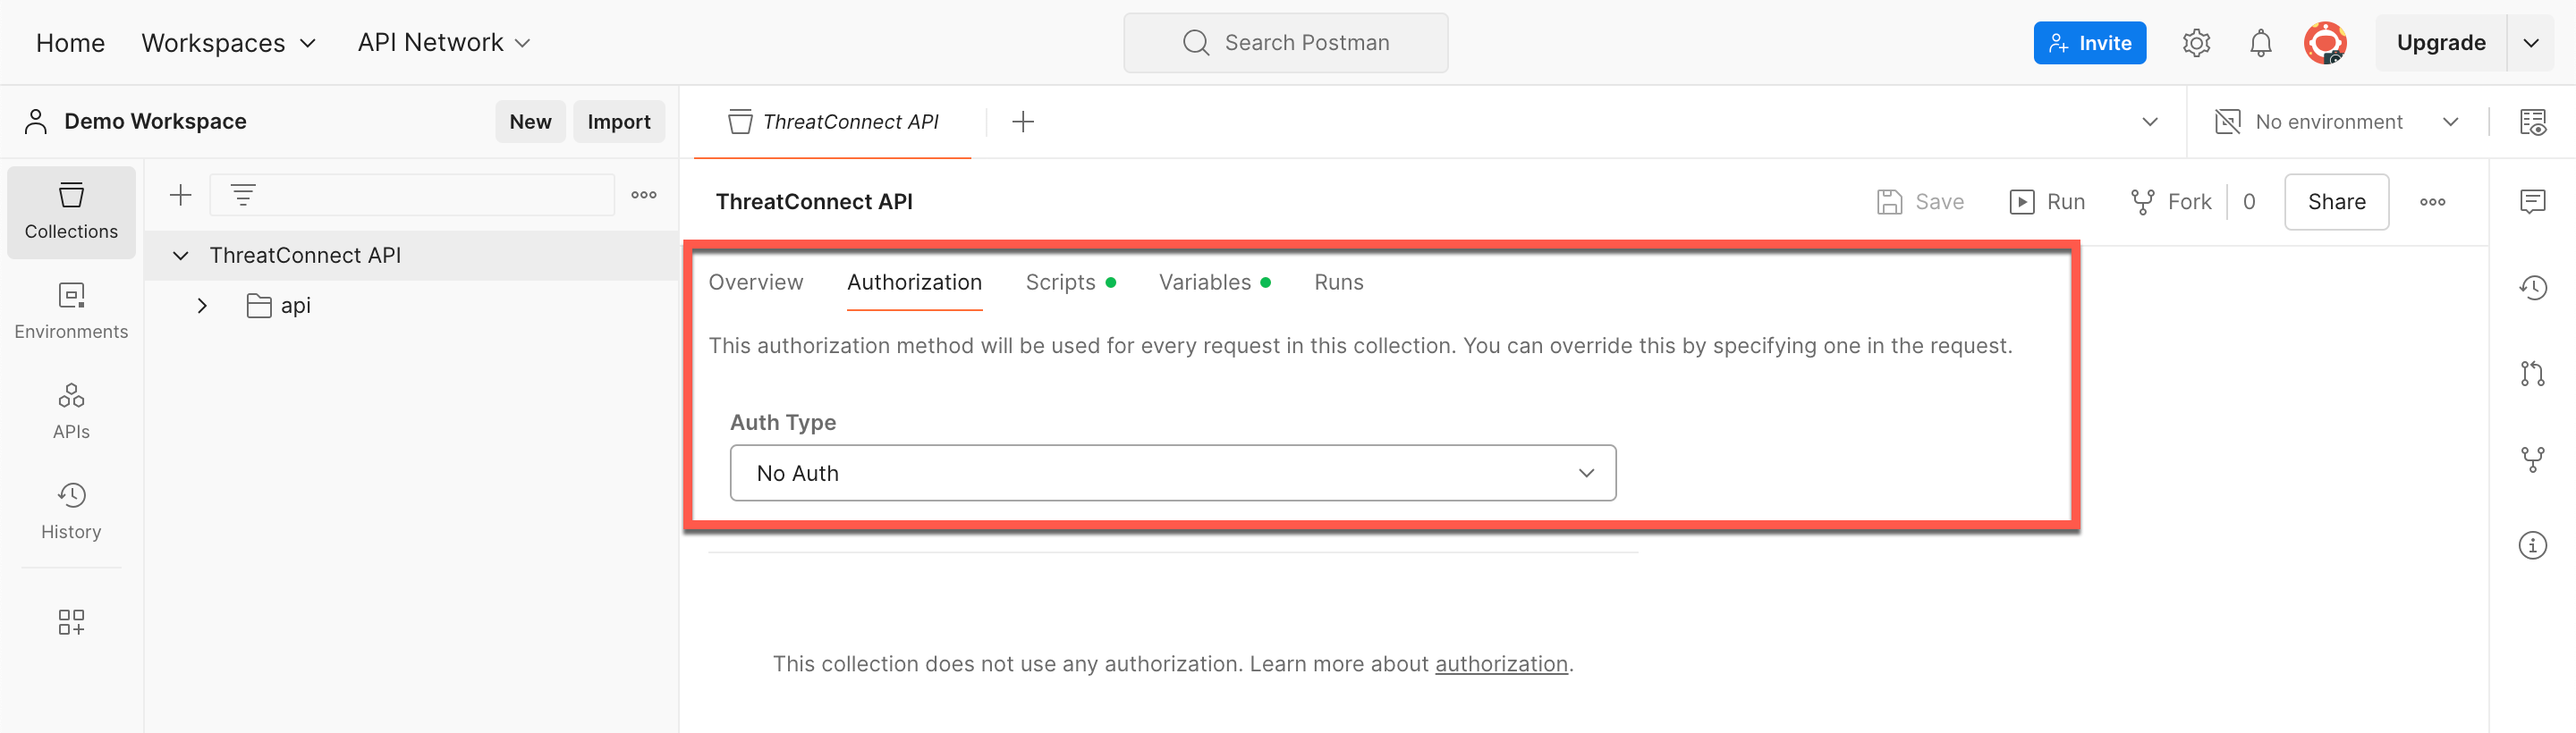
Figure 1
Select the Variables subtab in the ThreatConnect API tab to view the collection’s variables (Figure 2). The ThreatConnect API supports hash-based message authentication code (HMAC) and token authentication. Based on the type of authentication you will be using, fill out the corresponding variables, as detailed in the following sections.
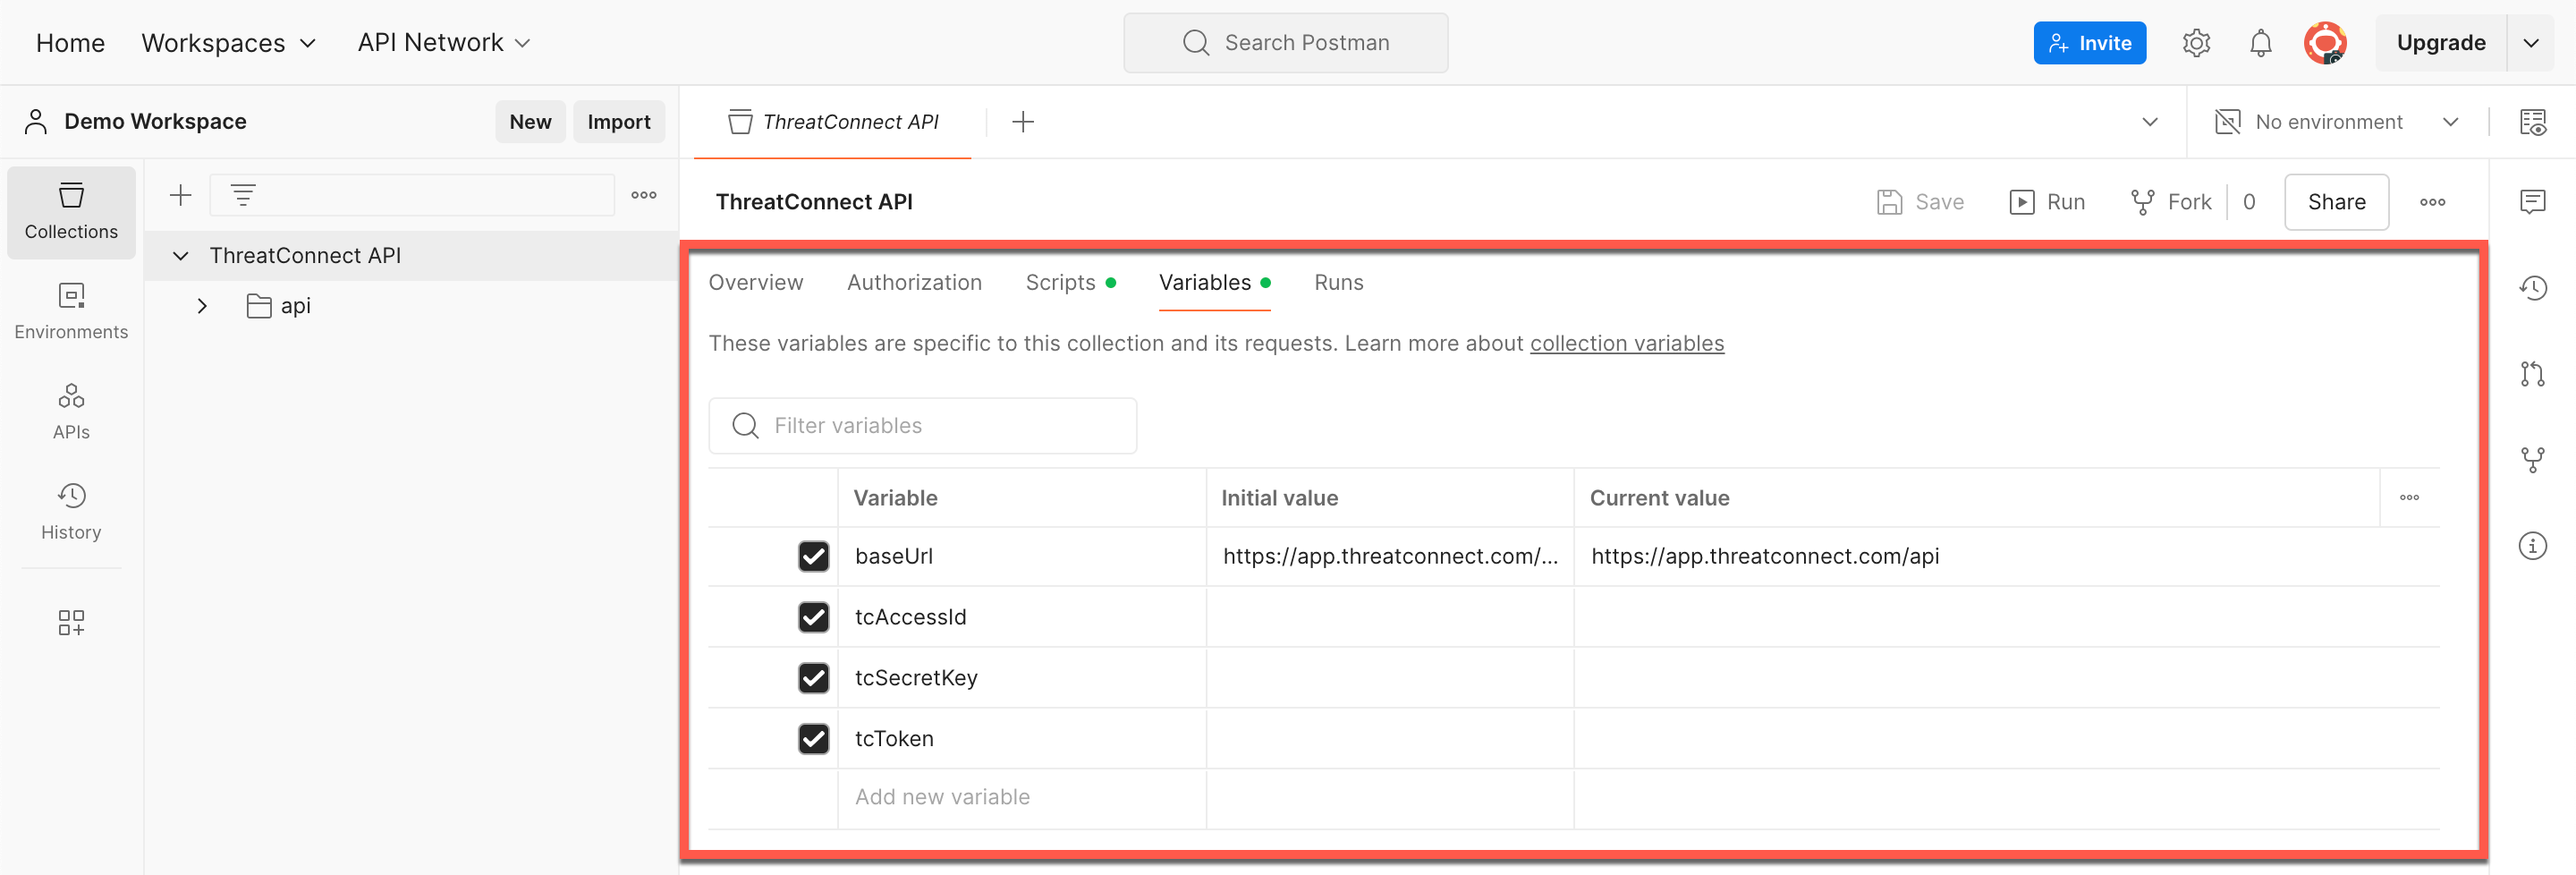
Figure 2
Click Save at the top right of the ThreatConnect API tab to save your changes to the collection.
Attention
If you enter an API token in addition to your ThreatConnect Access ID and Secret Key, token authentication will be used instead of HMAC authentication. However, if your token expires and you do not update the value for the tcToken variable or clear its checkbox, token authentication will still be used instead of HMAC authentication. Therefore, it is recommended to use one authentication method only.
HMAC Authentication
baseUrl: Enter the base URL for your ThreatConnect instance (e.g.,
https://companyabc.threatconnect.com). Do not include a trailing slash when entering the base URL.tcAccessId: Enter the Access ID for your ThreatConnect API user account in the CURRENT VALUE column.
tcSecretKey: Enter the Secret Key for your ThreatConnect API user account in the CURRENT VALUE column.
tcToken: Clear the checkbox for this variable.
Token-Based Authentication
baseUrl: Enter the base URL for your ThreatConnect instance (e.g.,
https://companyabc.threatconnect.com/api). Do not include a trailing slash when entering the base URL.tcAccessId: Clear the checkbox for this variable.
tcSecretKey: Clear the checkbox for this variable.
tcToken: Enter your API token in the CURRENT VALUE column. For instructions on generating an API token, see the “Authentication” section of Quick Start.
Step 3: Make a ThreatConnect API Request in Postman
Expand the following folders on the Collections tab in the Postman sidebar: ThreatConnect API > api > v3.
Expand an endpoint’s folder in the v3 folder to view all available requests for the endpoint.
Select an API request from the endpoint’s folder to open the request in the Postman workbench.
Configure your request as desired using the Query Params and, for POST and PUT requests, Body subtabs in the top portion of the request’s tab, and then click Send to the right of the request URL. If you connected successfully to the ThreatConnect API, response data will be displayed in the Body subtab in the bottom portion of the request’s tab (Figure 3).
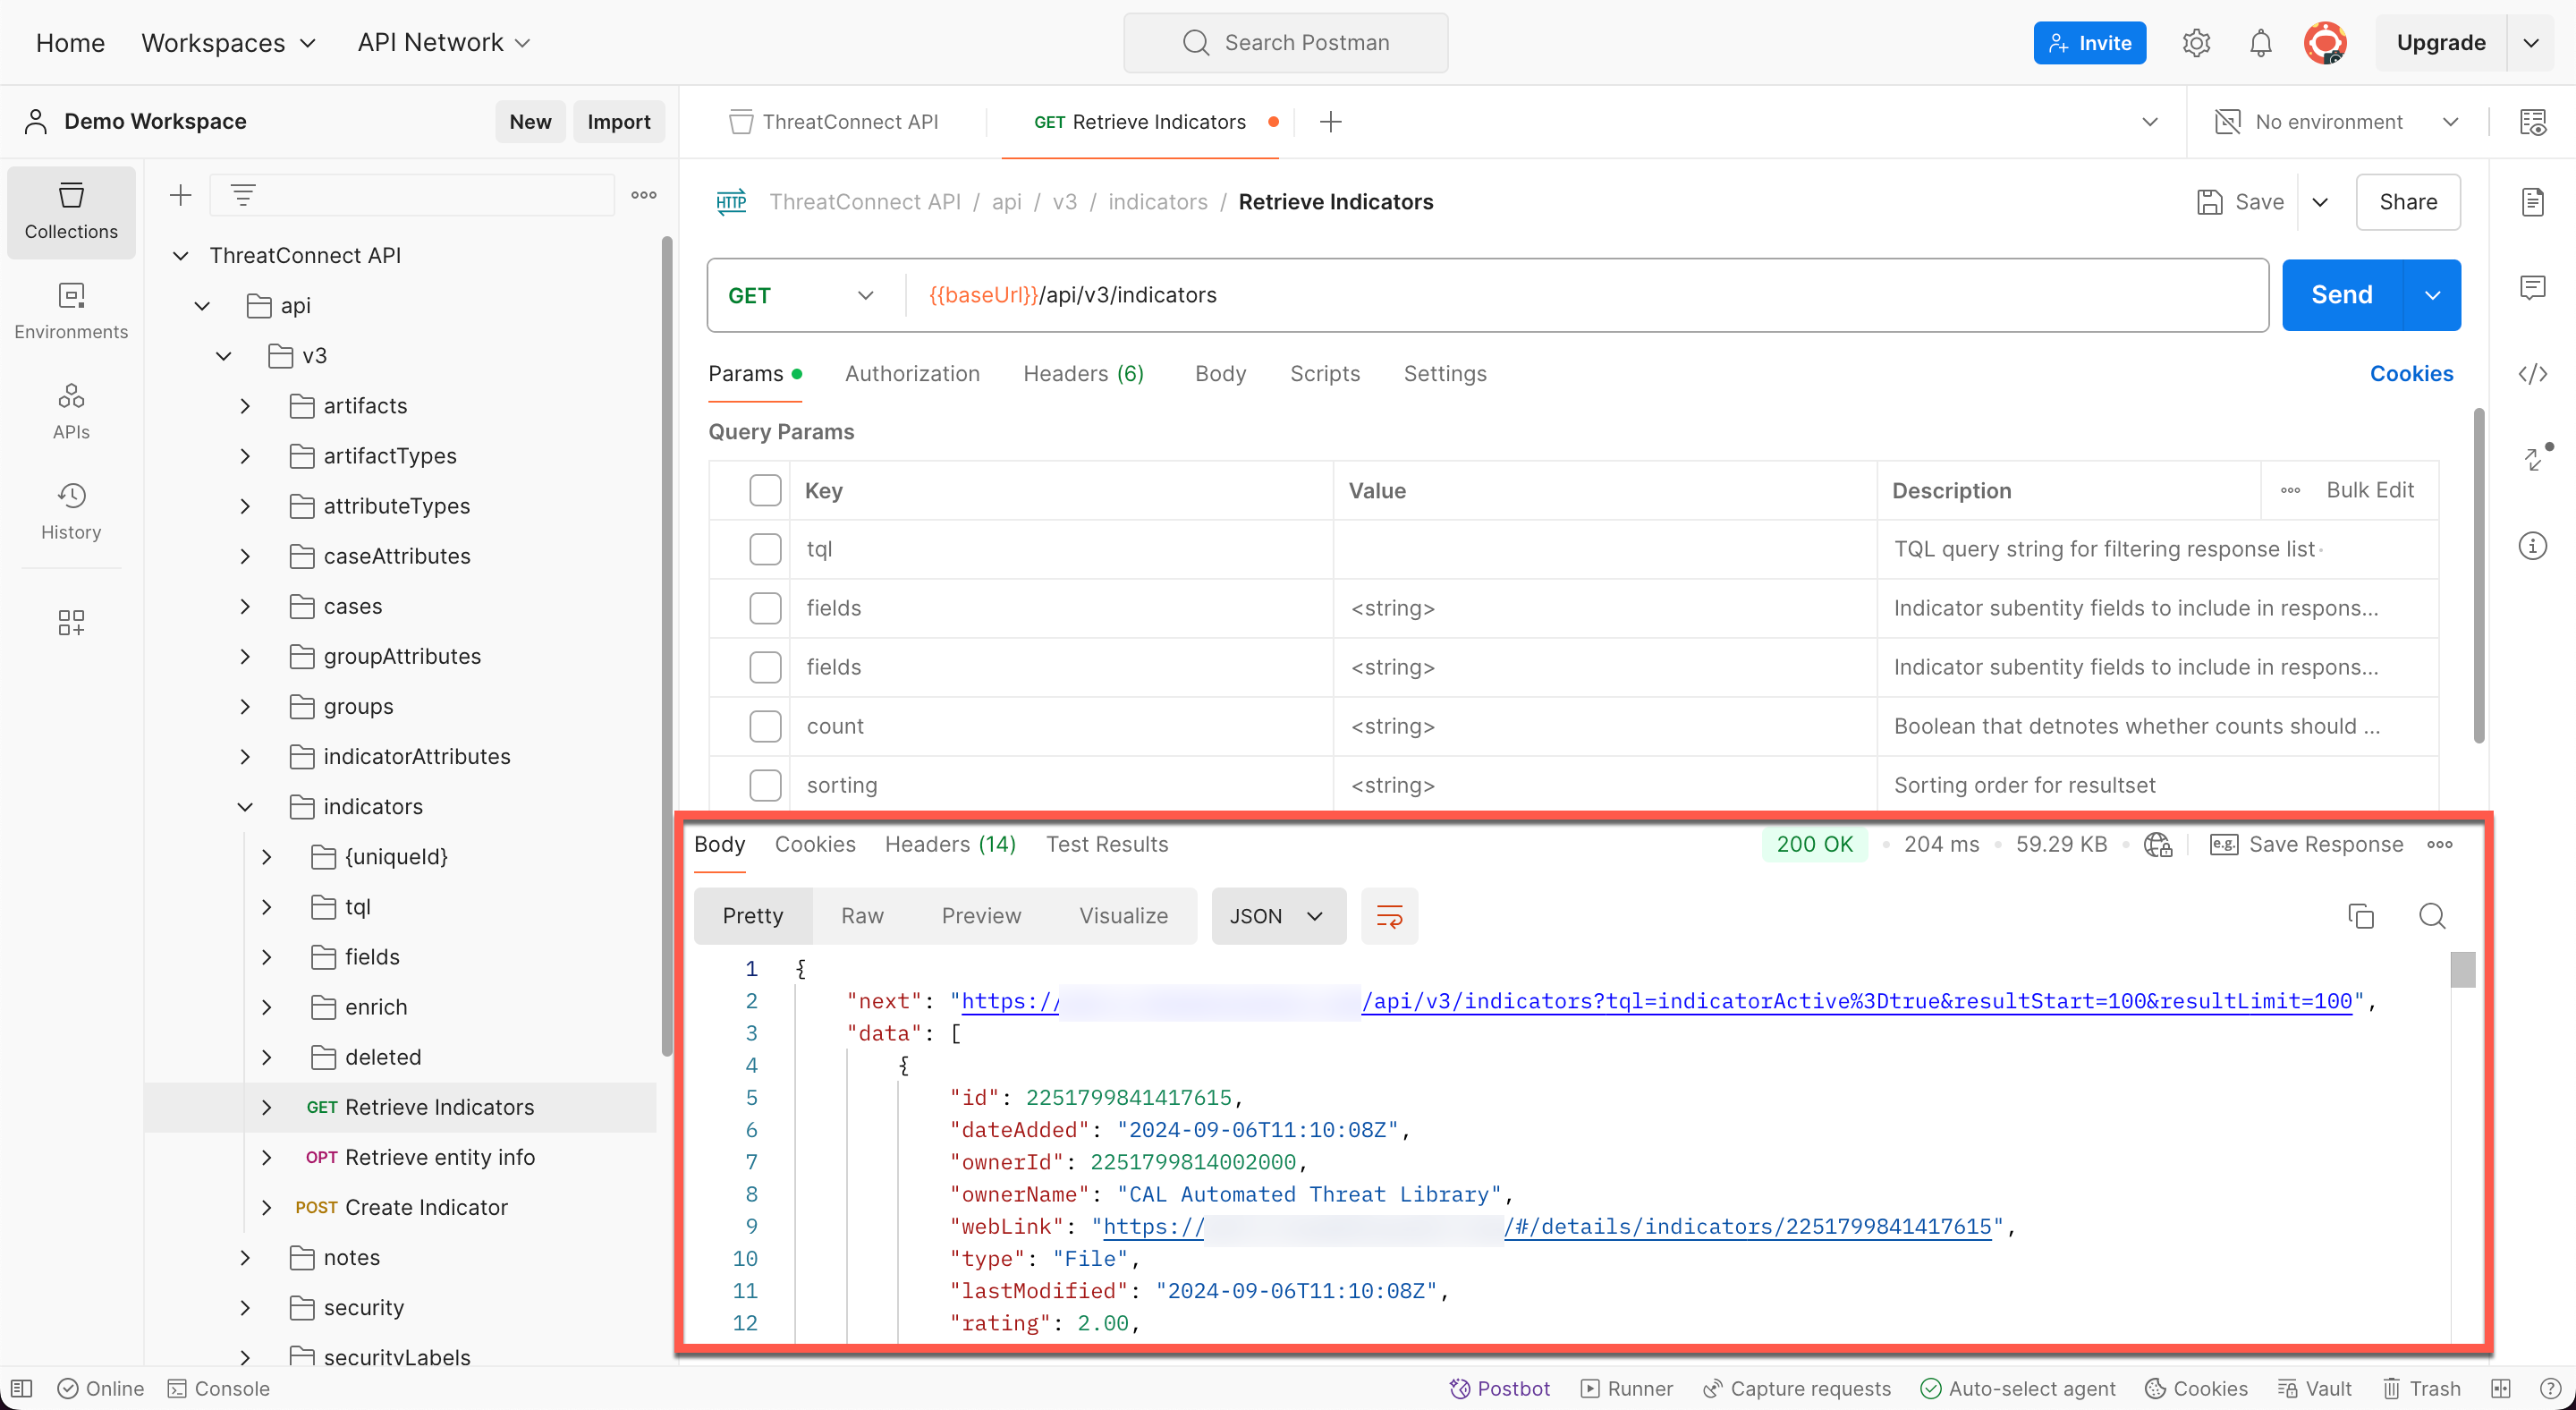
Figure 3
You’re now ready to use the ThreatConnect API collection in Postman. To learn more about each endpoint in v3 of the ThreatConnect API, select an endpoint under the v3 API section of this documentation.
Optional: Create Environments in Postman
If you use multiple ThreatConnect instances, it can be helpful to create an environment for each instance with the variables included in this collection via the Environments tab in the Postman sidebar. After you create an environment for each of your ThreatConnect instances, select the environment from the Environment at the top right of Postman before making API requests.
Postman® is a registered trademark of Postman, Inc.